
How to wrap a gift like a pro
There’s nothing quite like the excitement of handing over a perfectly-picked pressie to someone special, but when it comes to gift wrapping the nation is divided. Some love it – and some hate it so much that they pay other people to do their wrapping for them!
If you’ve got a busy month of birthdays, or you’re just preparing for Christmas, then now is the time to improve your wrapping skills. In this post, we look at how to wrap a gift like a pro.
How to gift wrap a box – step-by-step
Before you begin, gather together everything you’ll need to do the job.
- Wrapping paper
- Scissors
- Double-sided tape or a glue gun
- Ribbon (this is optional)
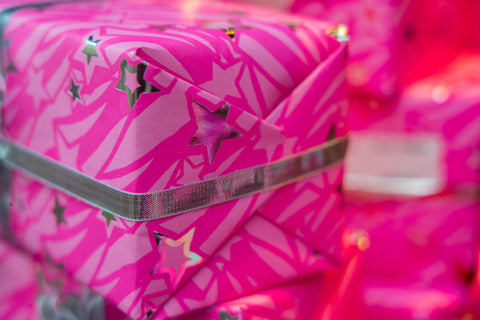
Thick or thin, it’s up to you what type of wrapping paper you use. Thick paper is less prone to ripping, but it’s harder to fold, so we recommend using medium-weight paper.
If wrapping isn’t your forte, look for paper with a grid on the back to make measuring and cutting easier.
STEP 1: Measure your paper
Start by cutting off the right amount of wrapping paper. You can do this by laying your box on the paper and flipping it over four times. This should give you enough paper to cover the whole box.
STEP 2: Fold the paper over
Lay out your paper (on a hard surface) and place your box in the middle. Fold the paper over one side of the box and secure it in the centre, then bring across the other side of the paper so it meets in the middle.
Before you tape it down, fold over the rough edge of your wrapping paper and make a sharp crease along the fold for a neat finish.
STEP 3: Close the open ends
This step is the trickiest, and this is where practice makes perfect! The aim is to create four 45-degree angles at each end of the box by folding the paper inwards. For a sharp edge, we recommend creasing the folds using your thumb and forefinger before you secure them in place.
STEP 4: Add your ribbon and tag
And that’s it, you’ve finished wrapping your box, but do you know how to add a ribbon? If you’re still mastering the art of tying a ribbon, then try this video tutorial from Made Everyday.
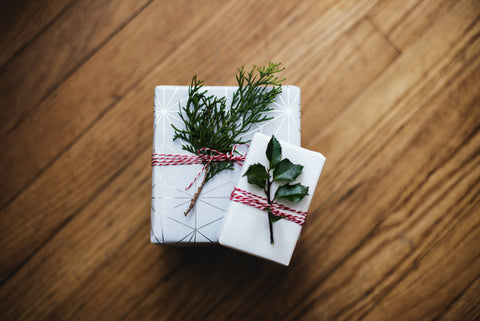
You can’t go wrong with a well-chosen ribbon for a professional finish but if you want to go the extra mile, then why not tuck a sprig of something green (real or fake) under your ribbon? This works really well at Christmas with seasonal foliage.
How to wrap a round gift (or something cylindrical)
Round-shaped gifts are every wrapper's nightmare, so how do you tackle that football you’ve bought your nephew or that jar of chutney for your nan?
There are a few options, but our favourite is the bowl method for spherical items.
For this, you simply cut a piece of wrapping paper to size, then lay it over a bowl with an opening just big enough to cradle the item you want to wrap.
Put your gift in the middle of the paper so it sinks slightly into the bowl then gather together the sides of the wrapping paper, working your way around the ball-shaped item. Finally, use a ribbon to secure the gathering and hold it in place.
For more tips, check out this article from WikiHow on how to wrap a cylindrical item.
How to make a gift bag out of wrapping paper
The obvious way to wrap something oddly shaped is to put it in a box, but if you don’t have any lying around the house, then why not try making your own DIY gift bag instead? They’re surprisingly easy to put together, and they’re great for those fiddly items that are hard to wrap.
Here’s what you’ll need to make a gift bag out of wrapping paper:
- Scissors
- Tape
- Wrapping paper
- Hole punch
- Ribbon
Start by measuring out how much paper you’ll need to cover the gift you want to wrap. Put your item in the middle of the paper and fold in the longest sides so they overlap slightly in the middle then secure with tape.
To make the bottom of the bag, fold over a few inches of wrapping paper and crease along the fold line using your thumb to make a sharp edge. Open up this rectangular section at the bottom and fold down the two shortest sides, so you’ve got a triangle on either side.
Crease along the edges, then still working on this small section fold in the two longest sides to meet in the middle and secure with tape. Put your hand inside the bag and push out the bottom.
Pro tip: use a piece of cardboard to strengthen the bottom of your gift bag.
For the top of the bag, you have two options. You can either fold the top and secure it with tape, or you can use your hole punch to make two holes and thread the ribbon through it to make handles.
Whether your attempt at gift wrapping is perfectly polished or needs a bit more work, the recipient will be overjoyed that you’ve tried. And if all goes wrong, then you can laugh about it after. Now all you need is a funny greetings card to go with it!
If you’ve enjoyed this blog post on how to wrap a gift, you might also like our article on great ways to let people know you’re thinking of them.